How to Insert Multiple Rows in Excel

Inserting rows in between selected rows, is one of the most necessary and important functions we require when working in excel worksheets.
Inserting a single row is quite an obvious and simple procedure as shown below;
Steps to follow in inserting a single row:
1. Select the existing row above which we need to insert the new row. (Left Click on the row number)
2. Right click on the row number.
3. Select “Insert” from the pop-up menu.
Such simple steps would enable inserting a single new row at the desired location.
However, we my need to insert multiple rows in between the existing rows which will become a tedious process if we were to insert one by one, following the steps shown above.
Instead, Microsoft Excel enables us inserting multiple cells at once by following the simple steps shown below:
Steps to follow in inserting multiple rows:
For example, let’s assume that we have to insert 5 rows above the 21st row.
1. Select the rows starting from 21 to 25. We have to select the same number of rows that we want to insert.
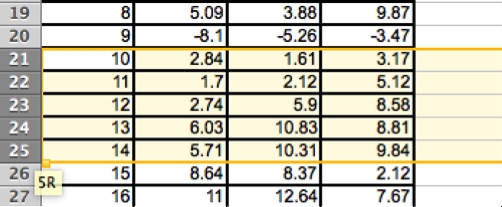
As we drag over the rows, a pop-up will show the number of rows currently selected as shown in the figure.
2. Right click on the selected rows.
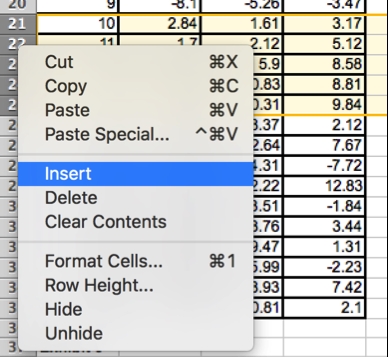
3. Select “Insert” from the pop-up menu.
Based on the number of rows that you had selected, blank rows will be inserted, above the first selected row.

The selected rows will be shifted down and their existing place will be replaced by new blank rows as shown in the figure.

Related Tutorials

SUMIF() functions is among the most commonly used functions in excel. Whenever ever we have to sum against a given criteria we revert to this function, be the criteria...

MS Excel offers seven logical functions, today we will discuss how to use AND () when summing up values.

In case you need to transpose a dataset in Excel, that is, you want to convert the columns into rows and vice versa, it is very hard to do that manually.


Latest
-
Understanding How HYPERLINK Works In Excel
Excel has a built in function to create hyperlinks &...
-
Understanding how MS Excel Query Works
“Query” in MS Excel has same meaning as ...
-
An Introduction To Excel Power Map
Our today’s post is about “Power Map&rdq...
-
Using Pivot Charts For Displaying Data
Conventional charts are mostly used for displaying r...
-
Using “Calculated Items” For Analyzing A Pivot Table
In our last post, we explored how to use calculated ...